AWS Identity and Access Management (IAM) allows you to effectively manage access to AWS services and assets for your user base, ensuring a high level of security. This service is designed for organizations that have numerous users or systems utilizing AWS services like Amazon EC2, Amazon RDS, and the AWS Management Console. IAM offers centralized user management, the administration of security credentials like access keys, and the regulation of permissions that determine users' access to AWS resources.
In this hands-on lab, you will gain knowledge on establishing IAM users.
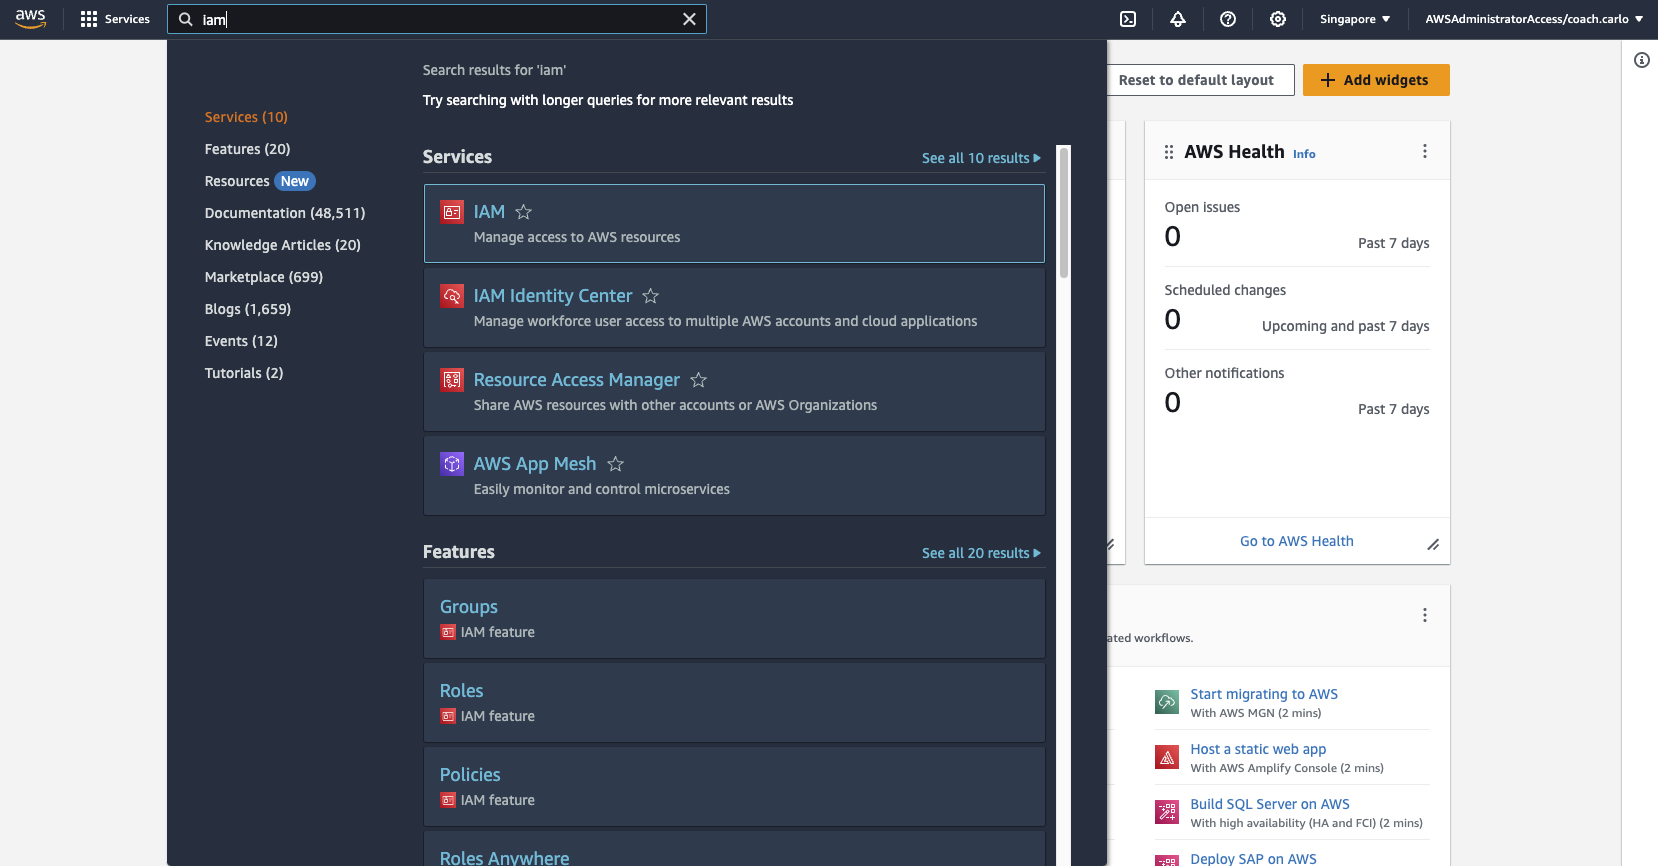
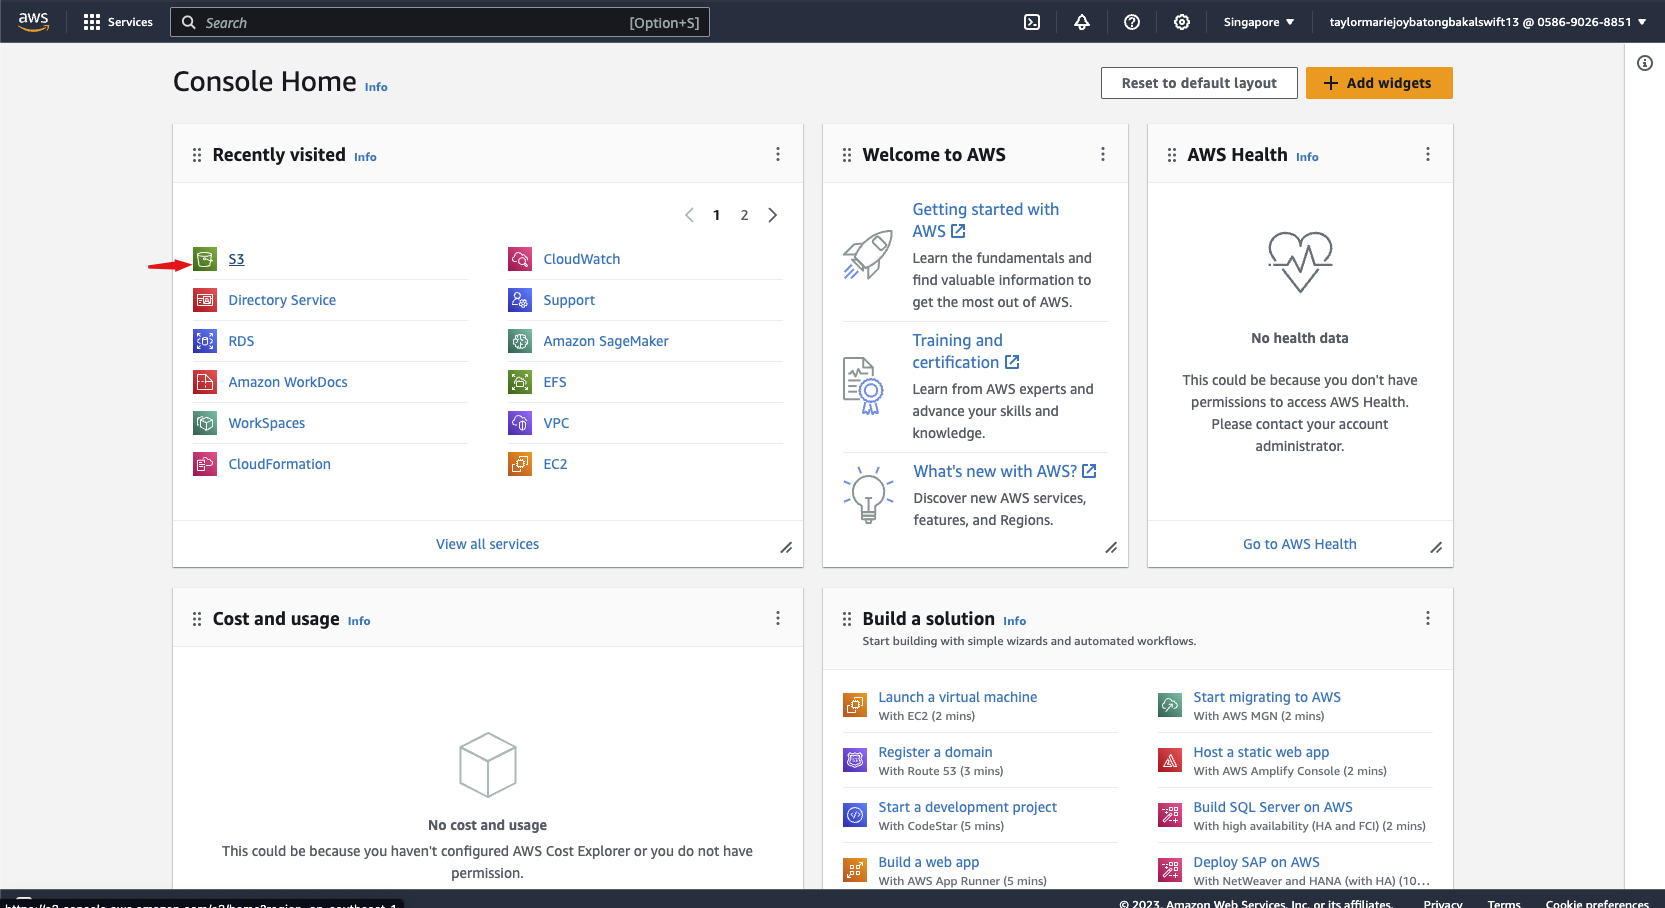
1-a From AWS Management Console, search for IAM.
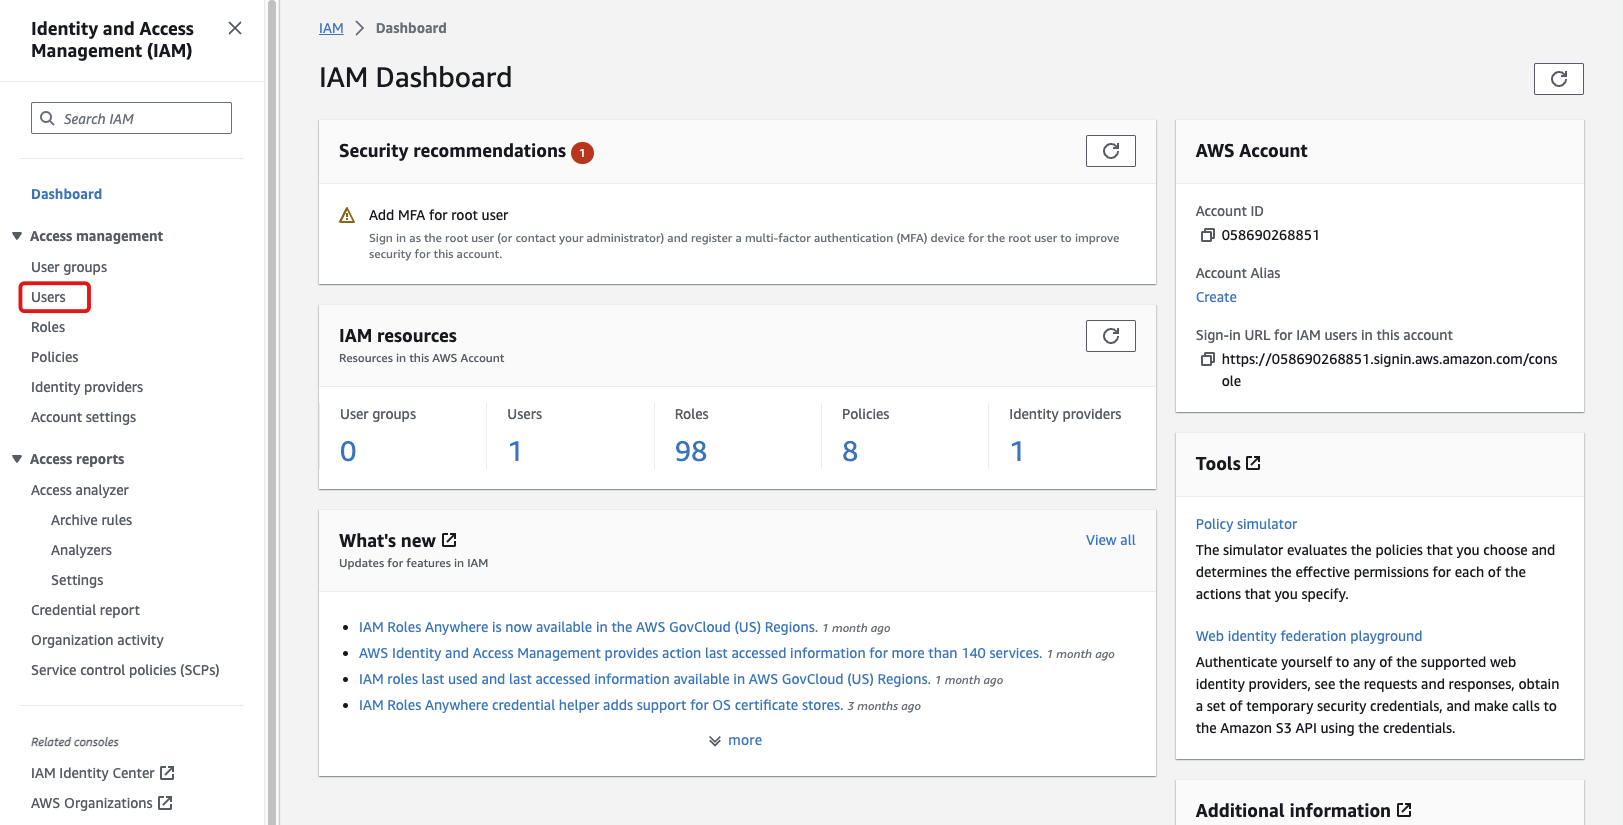
1-b On the access management tab, choose Users.
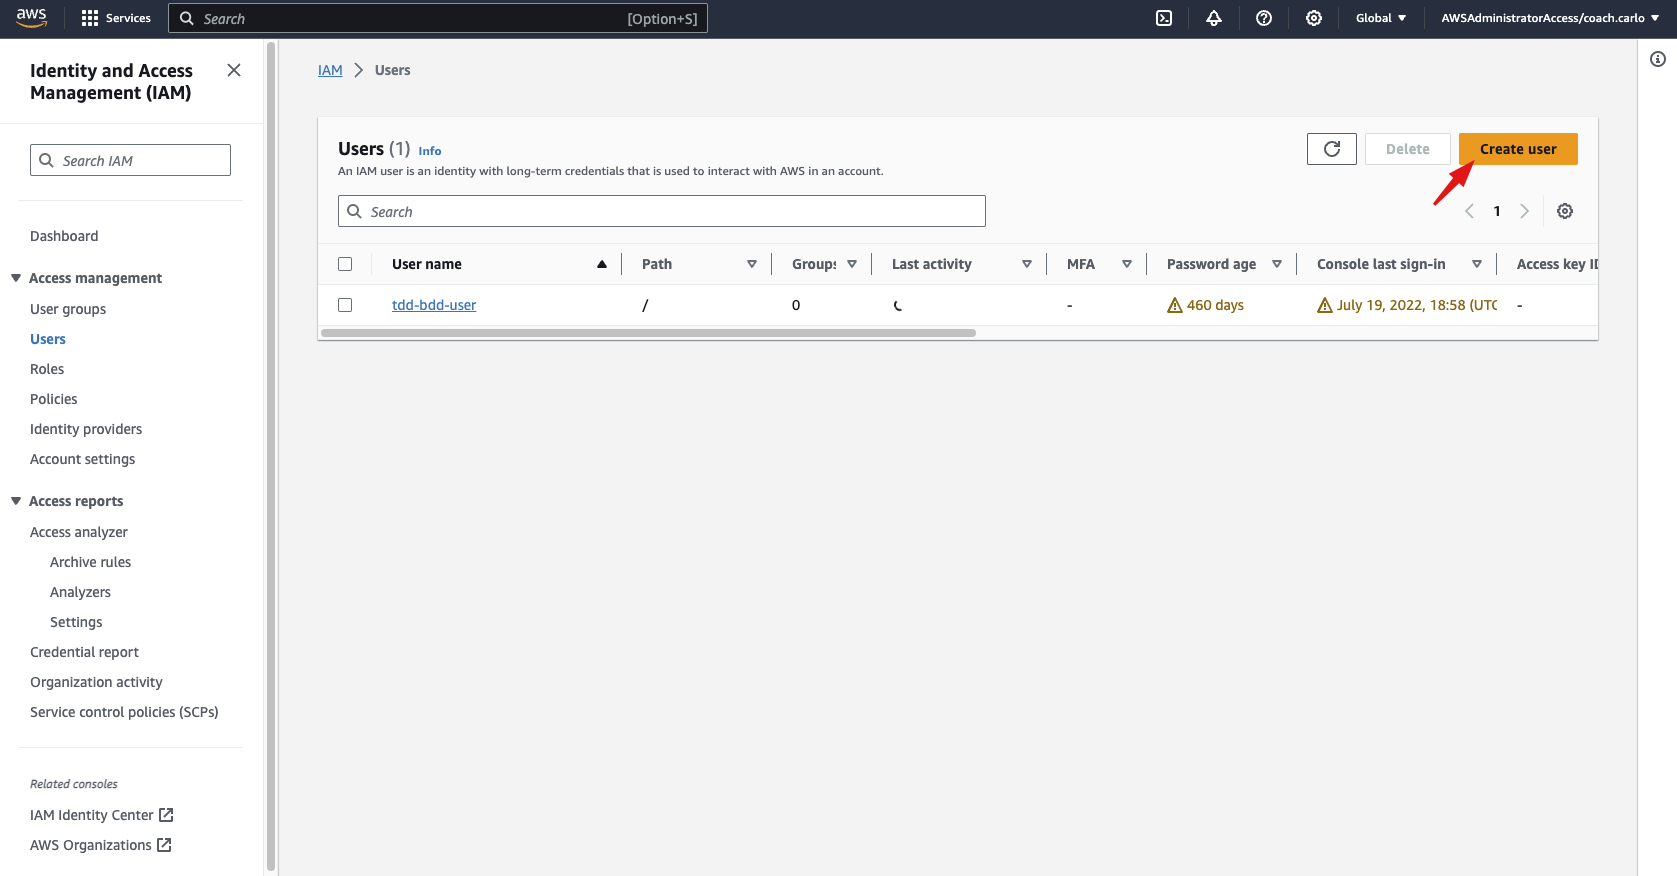
1-c Create user by clicking "Create User" button on the console.
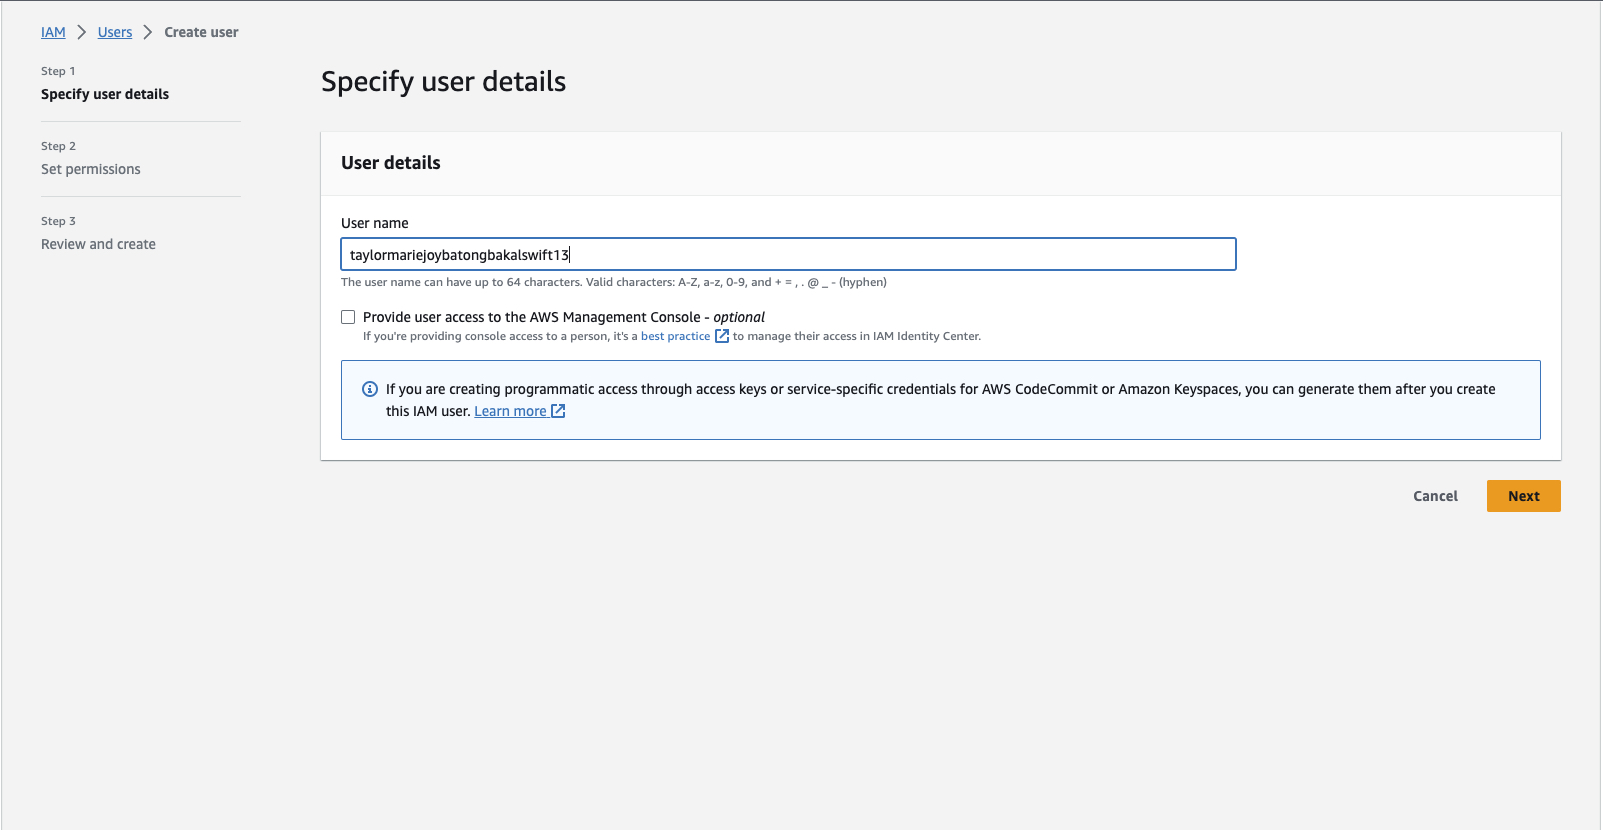
1-d Enter the user name of the IAM User you are creating. This will be used by the user to login to the AWS Management Console
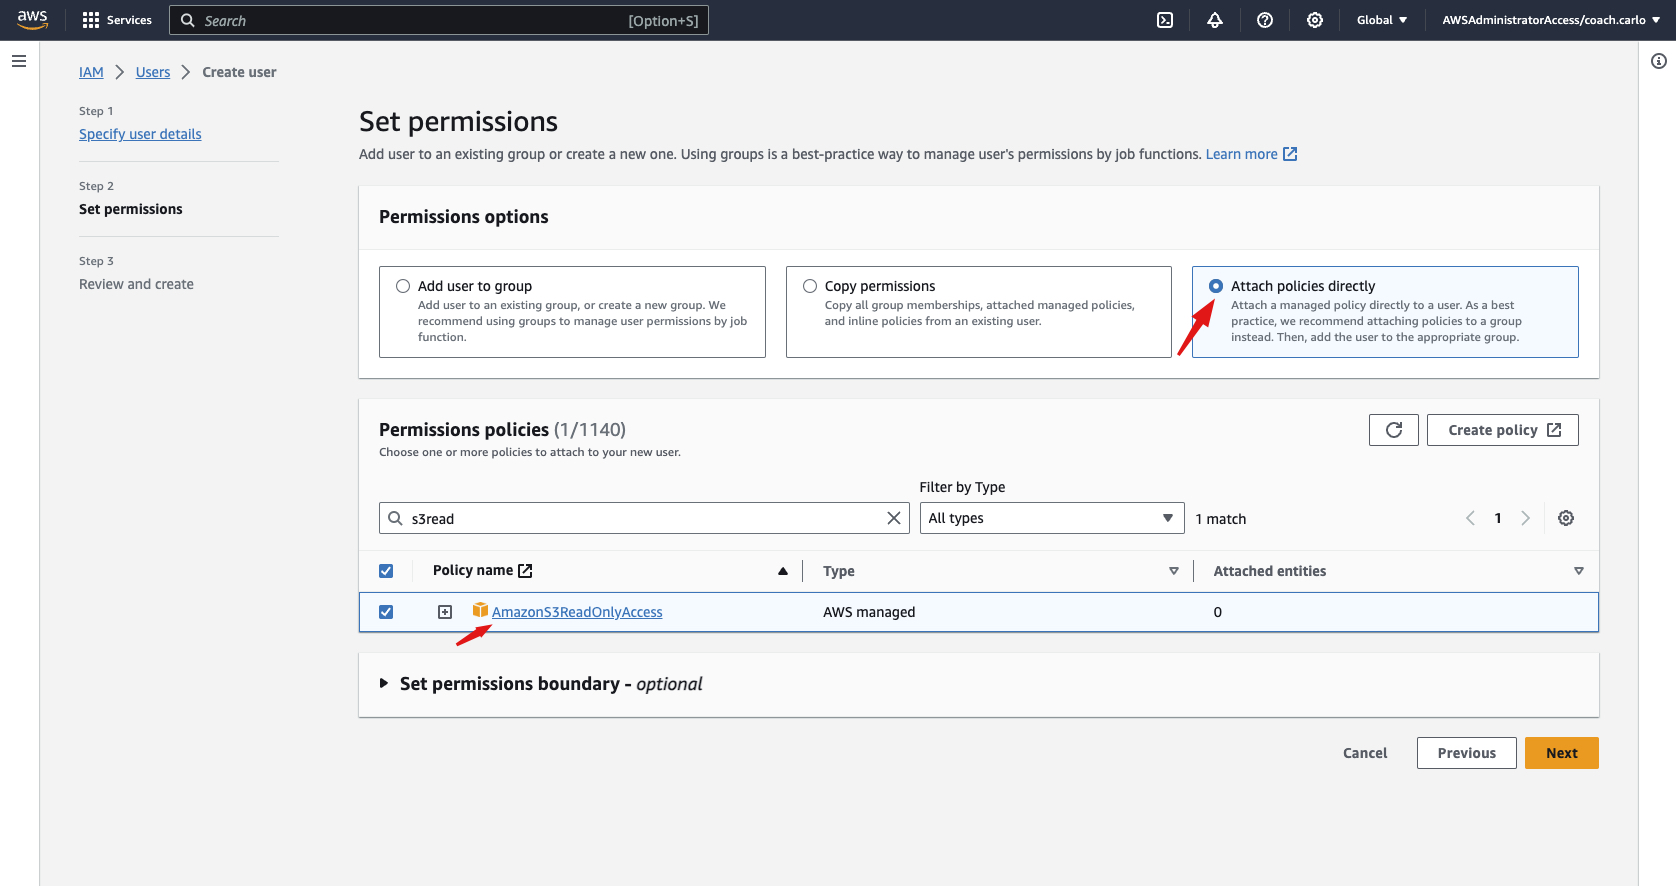
1-e Set the permission for the IAM User by choosing "Attach policies directly". IAM Policies are set of rules and permissions that determine what actions users, groups, and roles are allowed to perform on AWS resources. These policies help in controlling and managing access to AWS services and resources securely.
1-f Choose the AmazonS3ReadOnlyAccess on the permission policies to be given to the user you are creating.
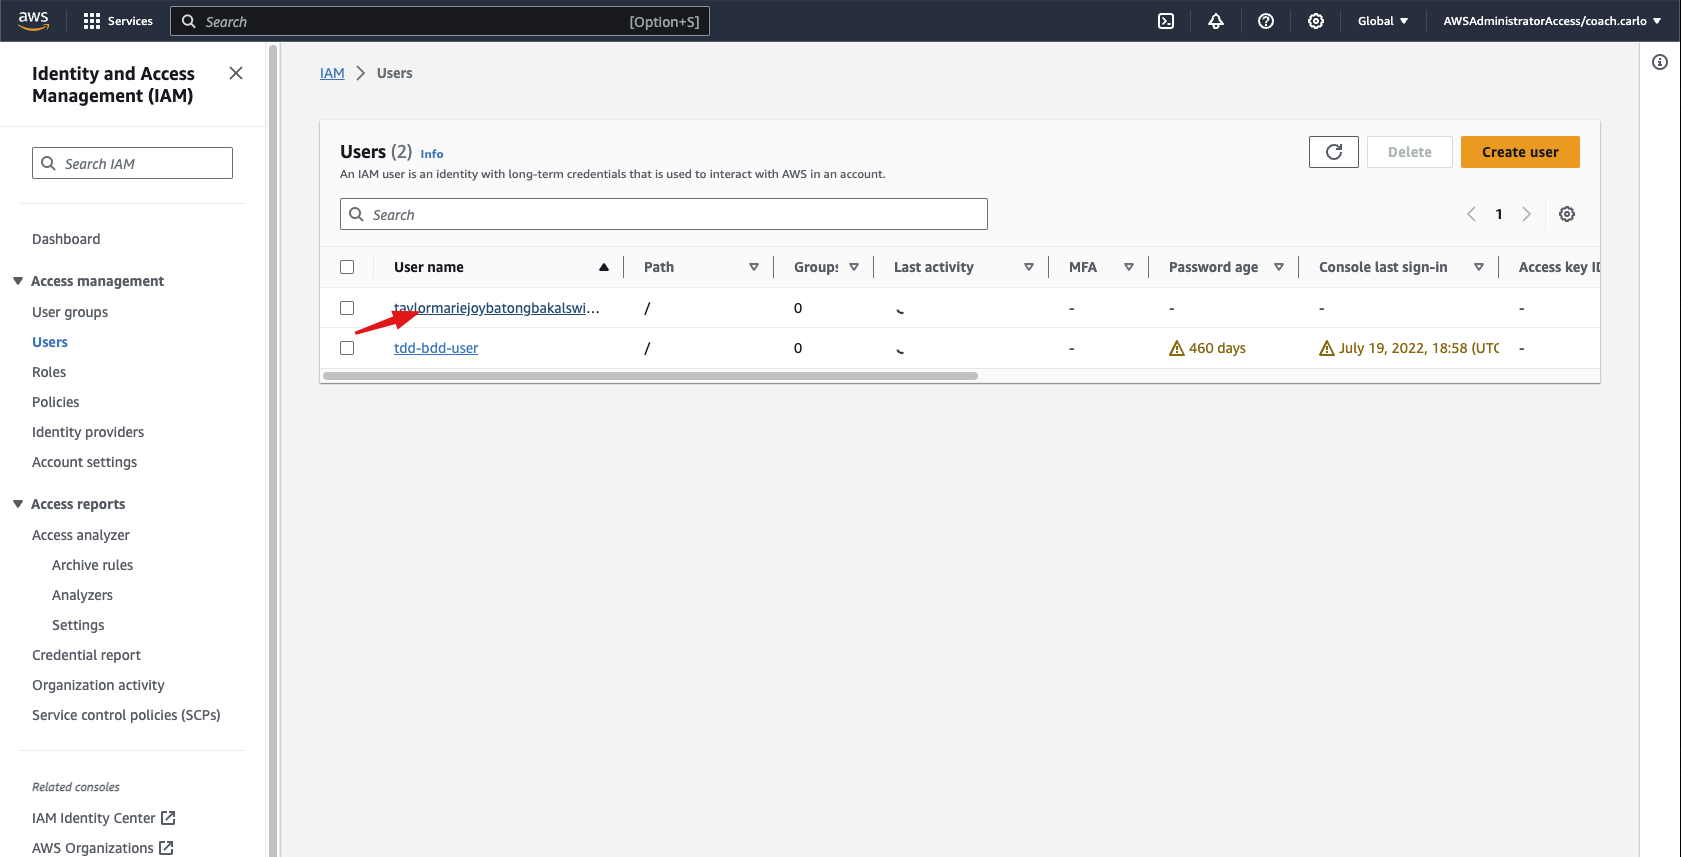
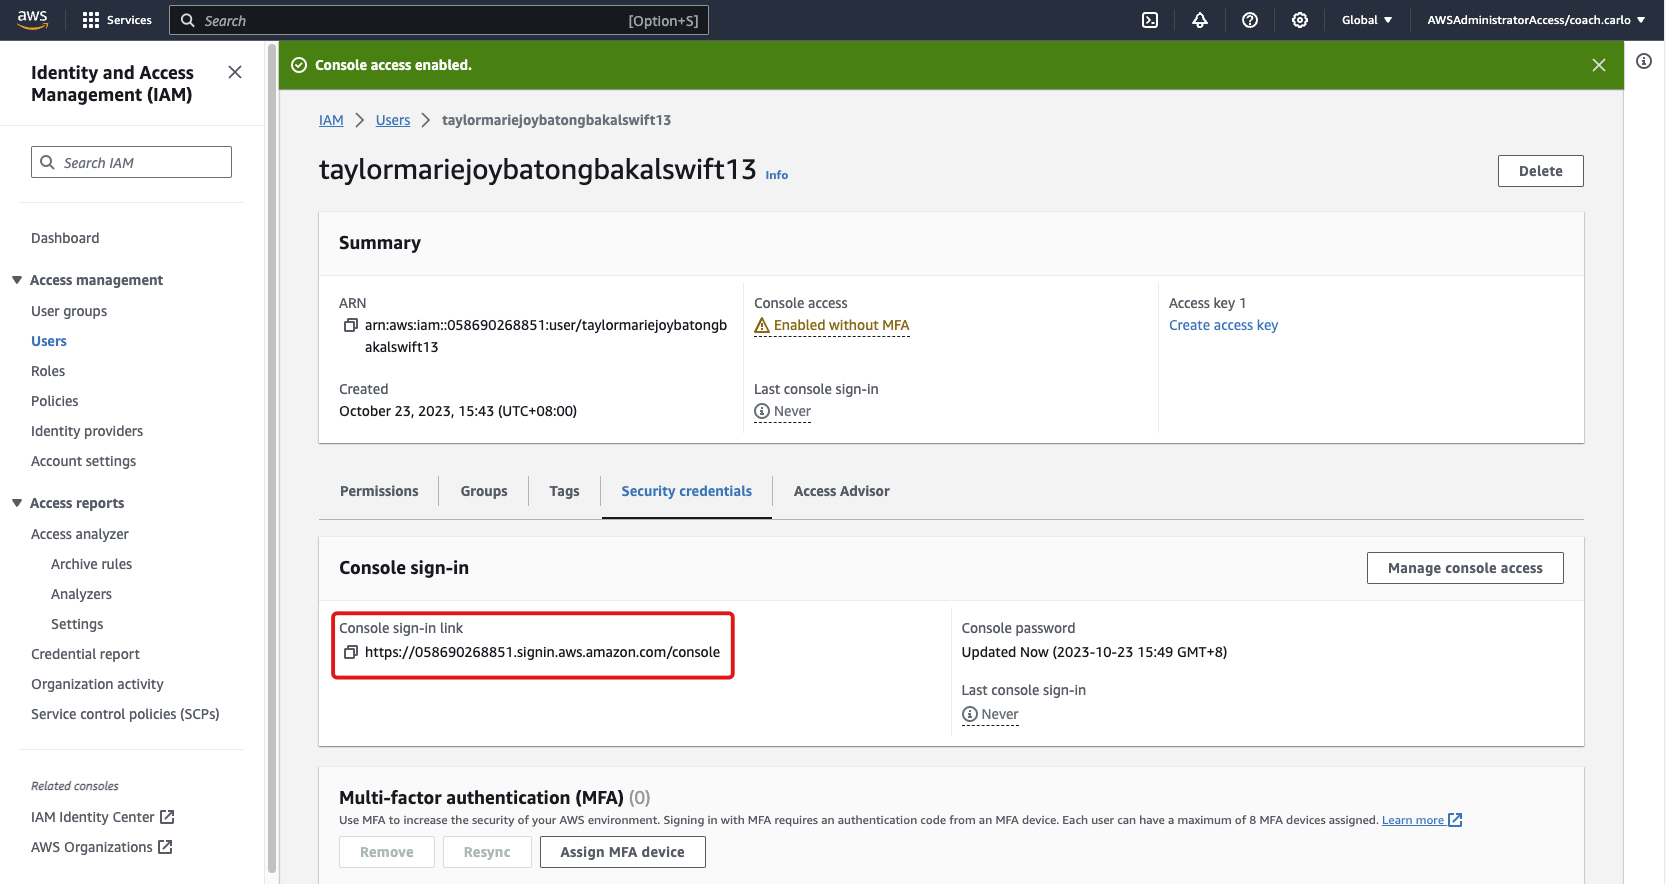
2-a Once back in the IAM Users Page, click on the user you recently created.
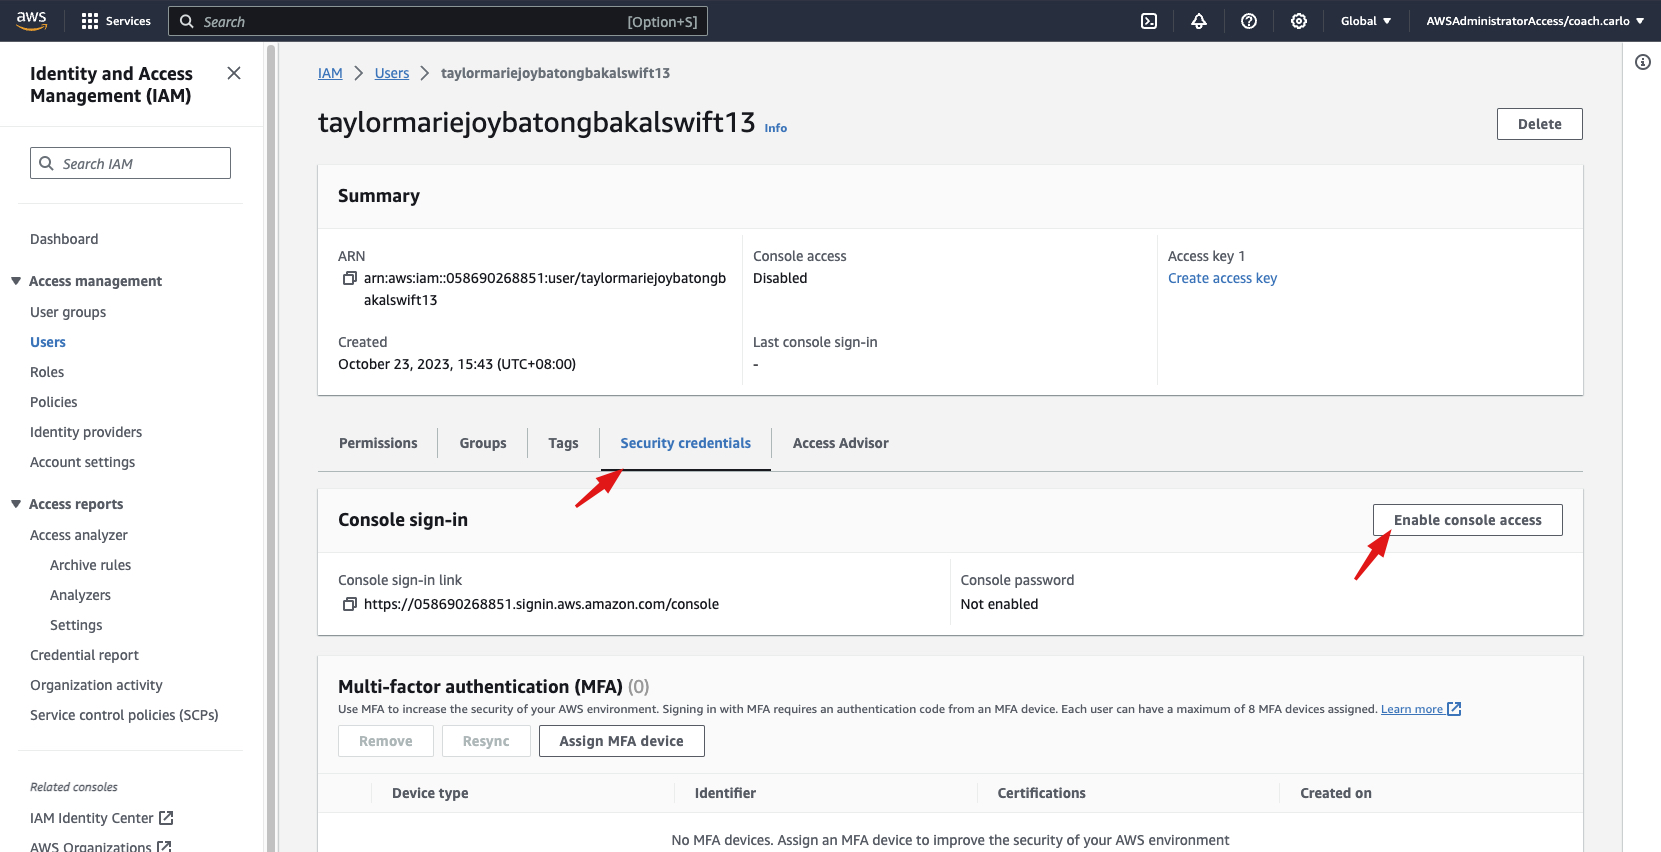
2-b Choose the security credentials tab and click "Enable console access"
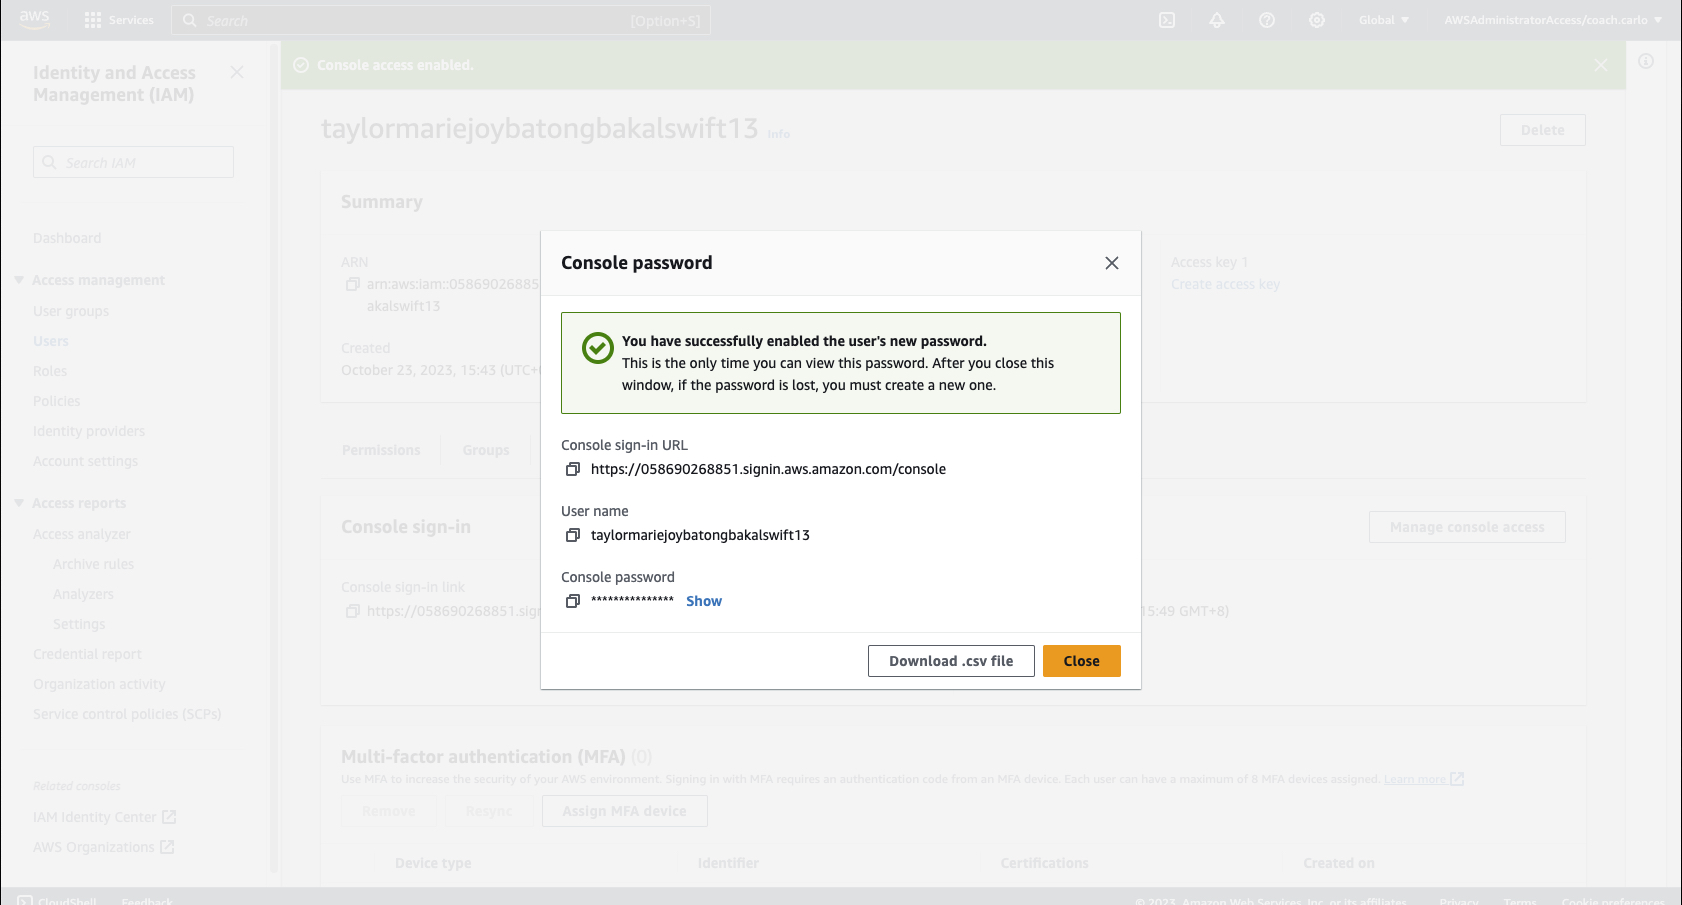
2-c Choose to enable console access for the user. You can choose to create a custom password for the user or an autogenerated password. You can also tick the box that makes the user create a new password at next sign-in to make their account more personalized and protected.
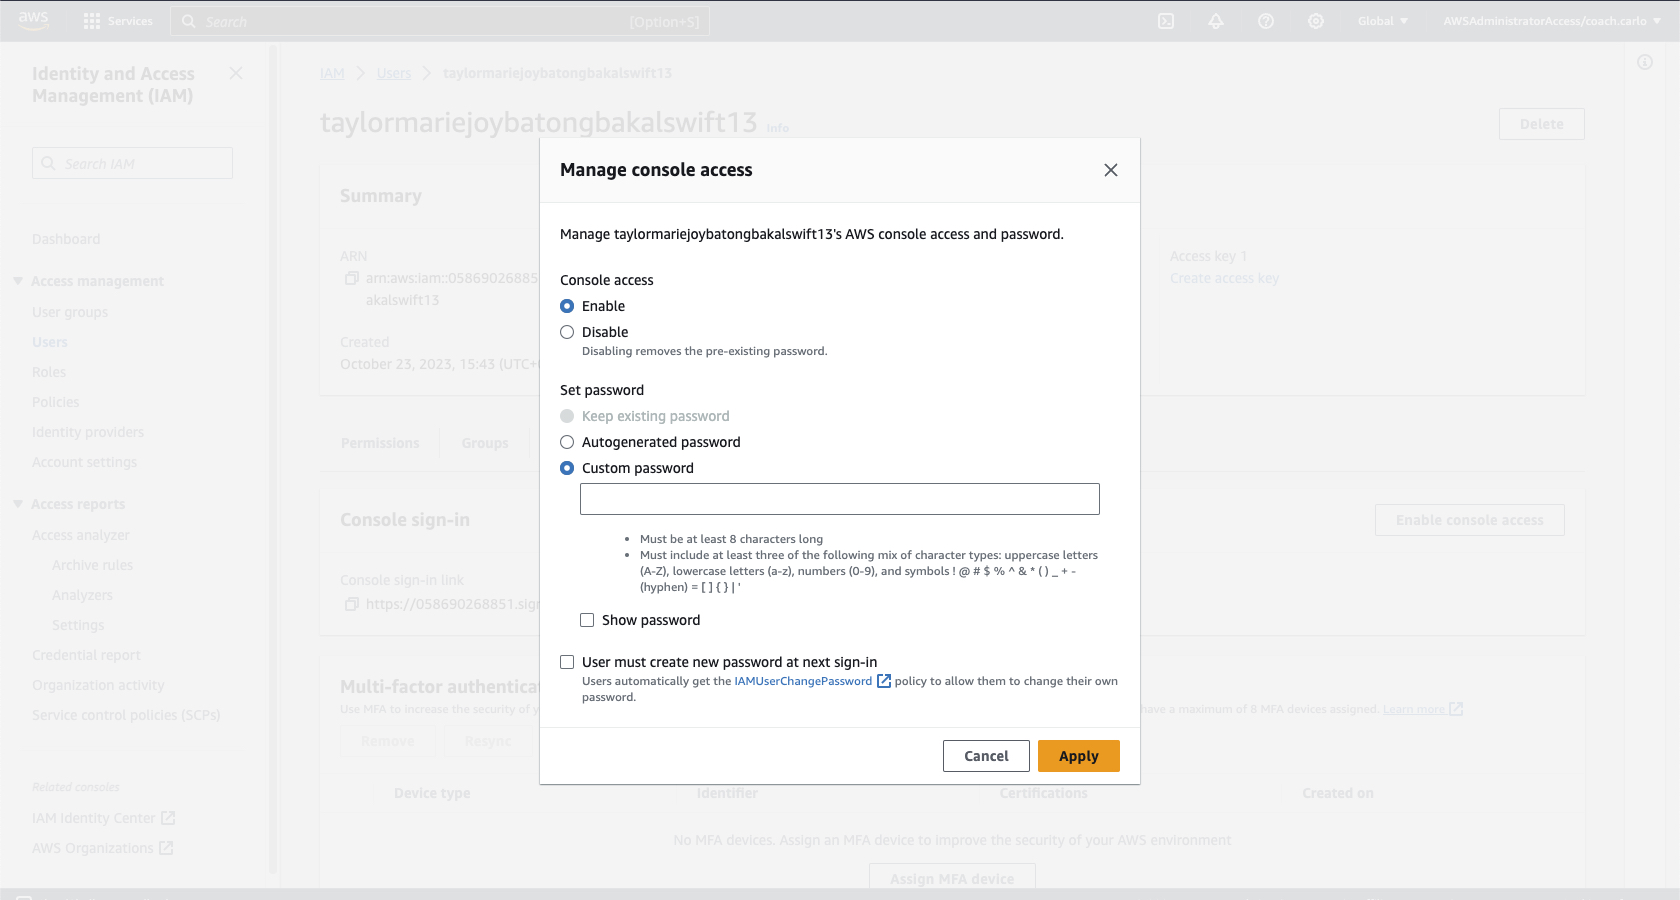
2-d Once you created or autogenerated a password click Apply and wait for the confirmation that the user's password is enabled. You can also download the .csv file which will contain the username and password if you want to store it on your local machine/storage device.
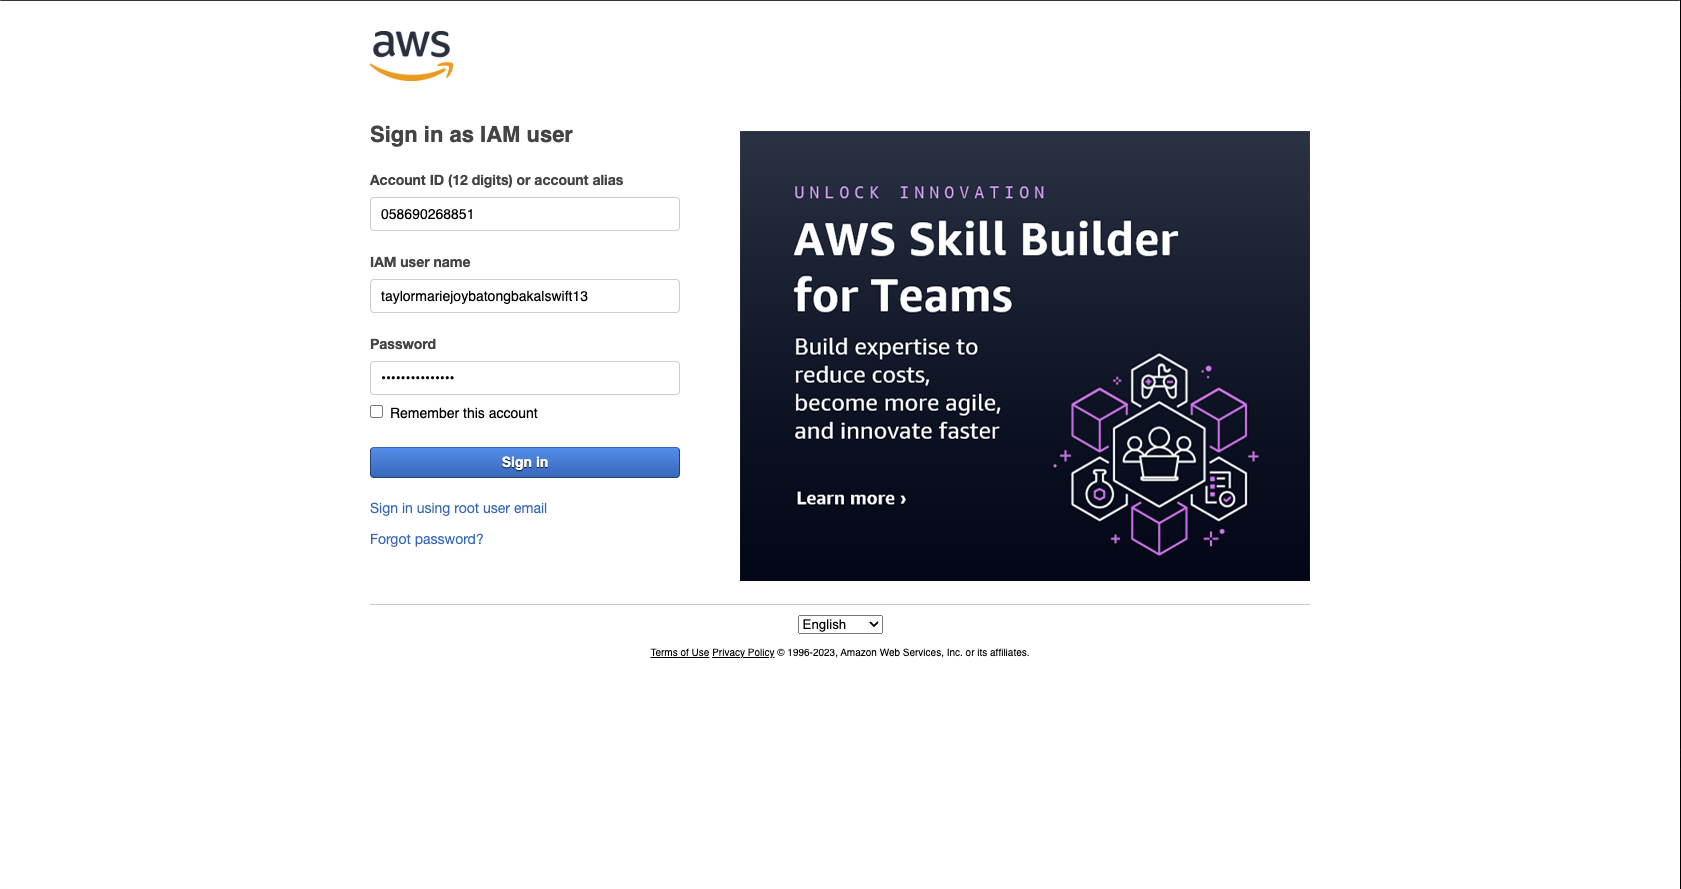
3-a Back on the users page, you will see a console sign-in link. Open a new incognito browser tab so that you can sign in as the IAM User. Fill up the needed information: user name and password and click the "Sign in" button.
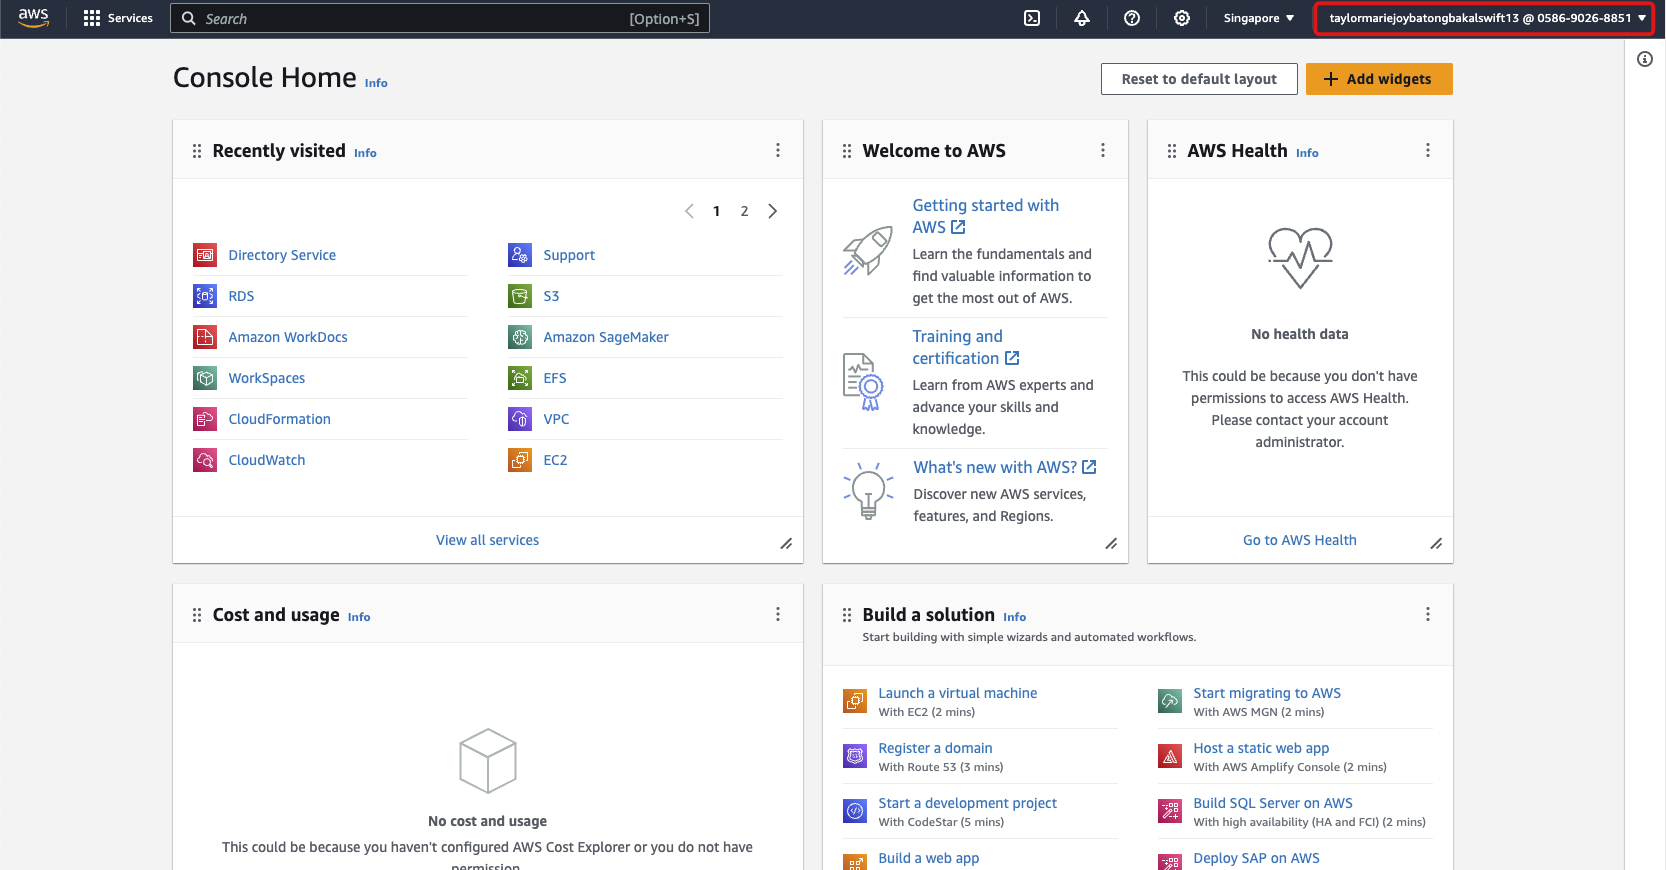
3-b Once logged in, you can notice that the username is displayed on the top right of your AWS Management Console. This proves that we are currently signed-in as the IAM User you created.
3-c Go to Amazon S3.
3-d Look for the genc-bucket-01 and delete the file inside.
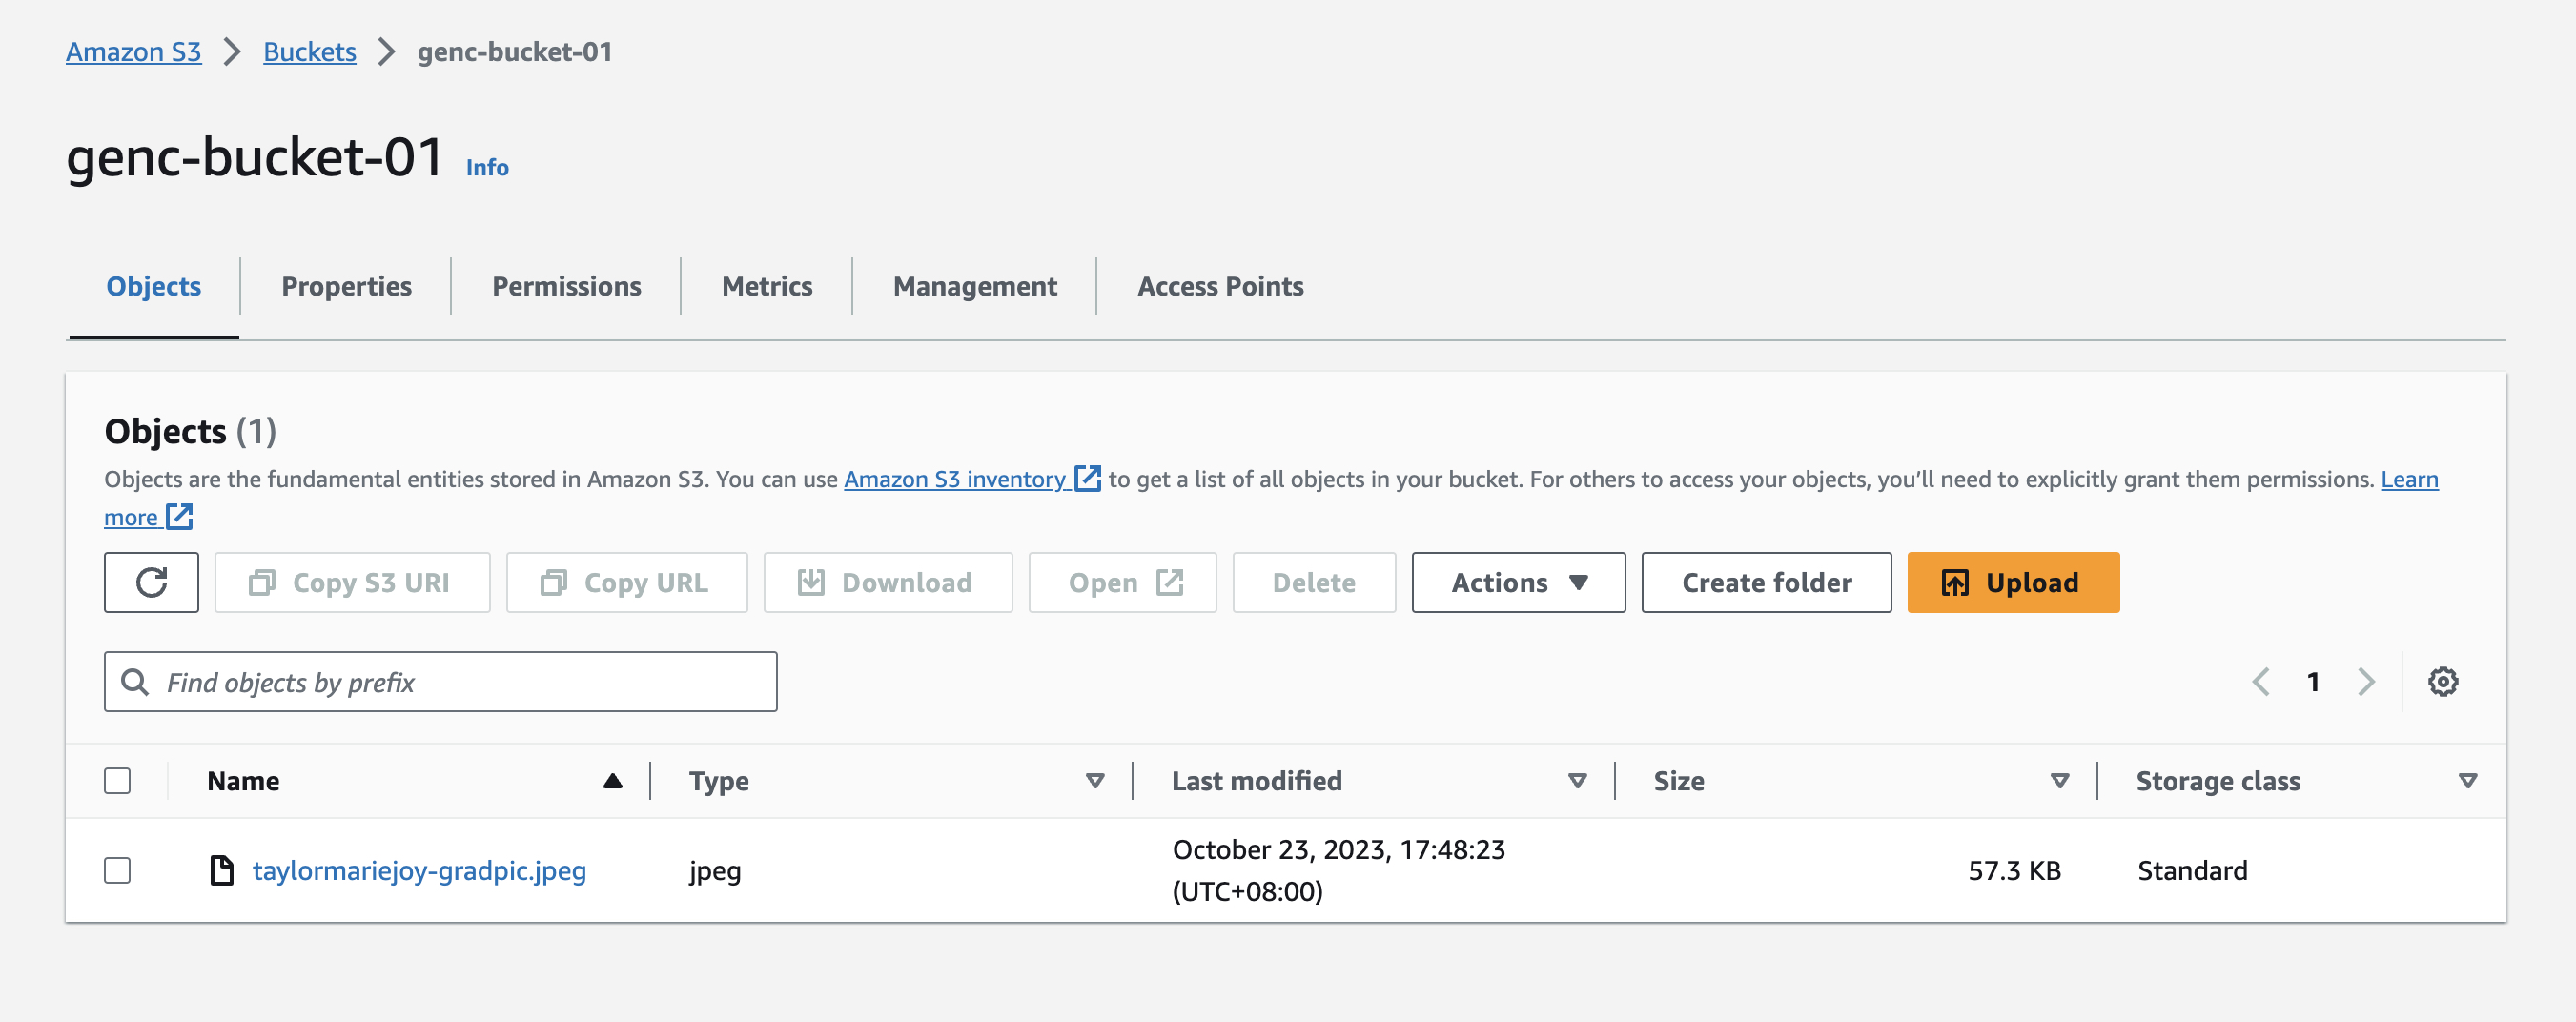
3-e If lab was setup correctly, you will not have permission to delete the object in the S3 bucket since the permission we gave the user is read only access to s3.
3-f To finish the lab, please enter the username on the JSON File.
{

   "user_name": ""

}